
Main menu
You are here
Custom Genre using Performance Field #1
Using the Performance Flag field within Theatre Manager you can create your own customized drop-down for genre. You then comment out on the TMtickets.html and add code to reference the Performance Flag.
|
The Event Genre will still apply in the TicketTrove application. |
To create your own customized Genre for online reporting, you perform the following steps:
Step 1 - Rename the Custom Genre Field
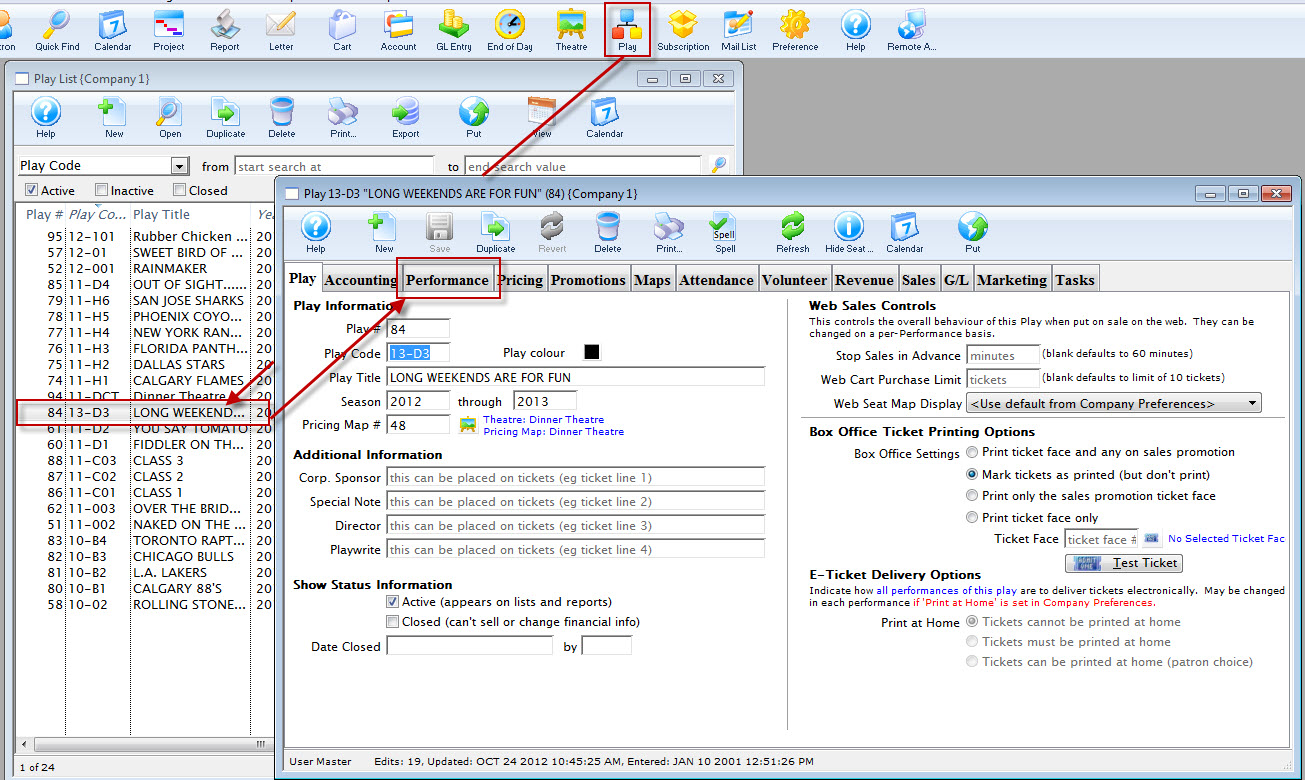
The first step is renaming the existing Performance Flag to something that will make sense in the future. This is done in Company Preferences.
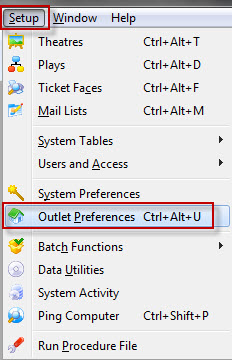
- Click Setup >> Company Preferences.
The Preferences window opens.
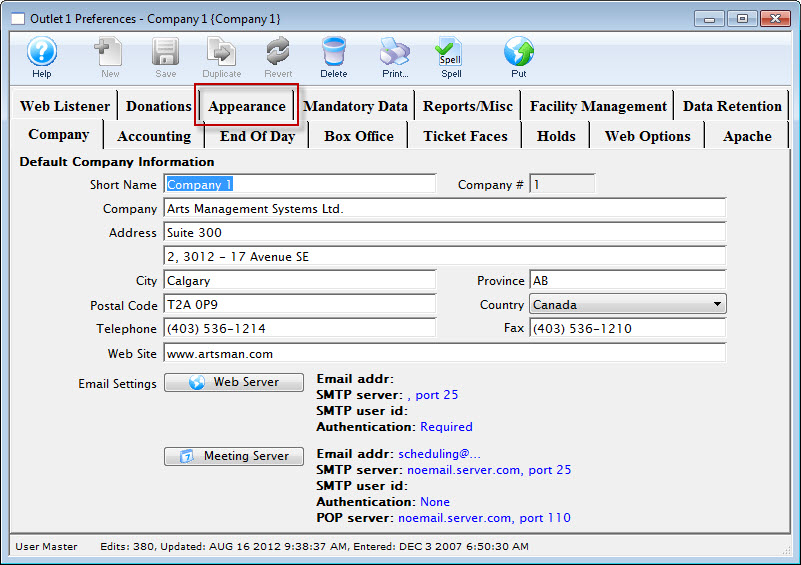
- Select the Appearance tab.
- Scroll down to Performance Field #1 (lookup).
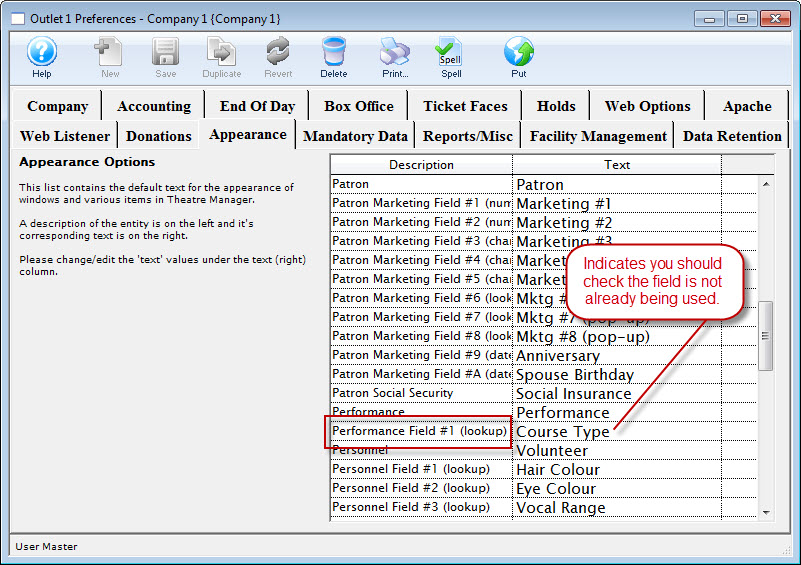
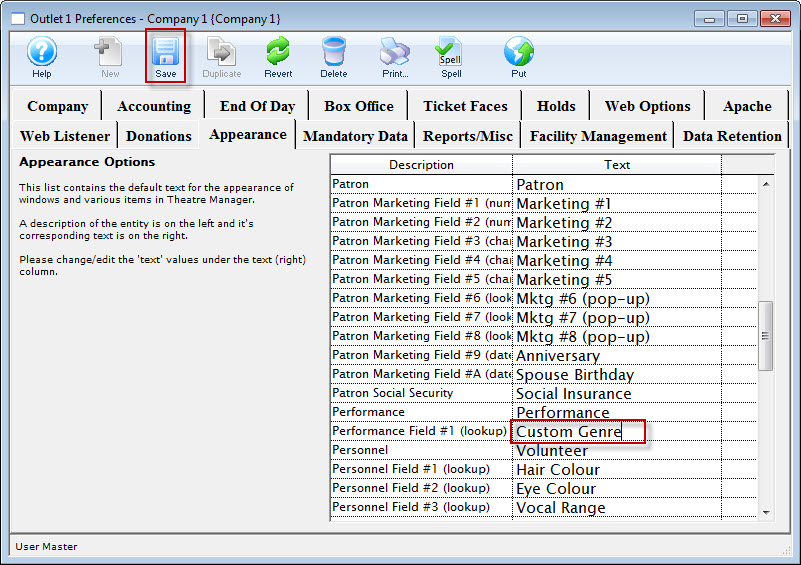
- Click in the field to the right of the Performance Field #1 and change the text to Custom Genre.
- Click the Save
 button.
 - Close the Company Preferences.
|
The Performance Field #1 may be used in other parts of Theatre Manager (such as course). If the fiedl contains something other than Perf Type, double check it is NOT being used elsewhere before changing any information. |
Step 2 - Add Custom Genre Options
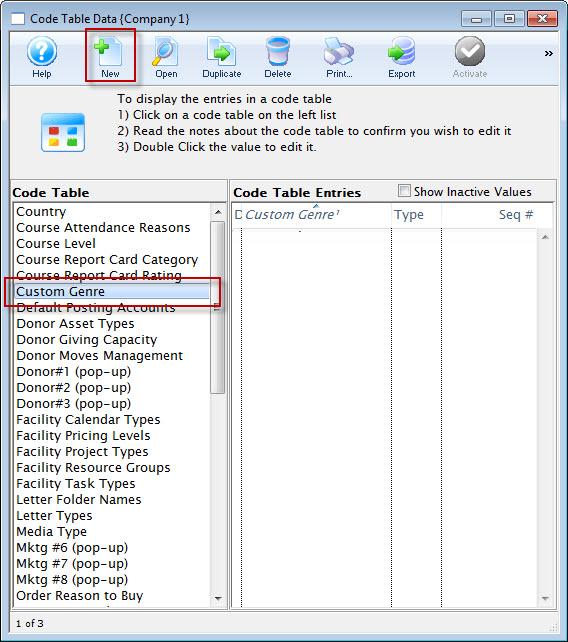
Yoiu can now add a unique list of Genres to your database. You do this in the code table. Click here for more information on Theatre Manager's Code Tables.
- Click Setup >> System Tables >> Code Tables.
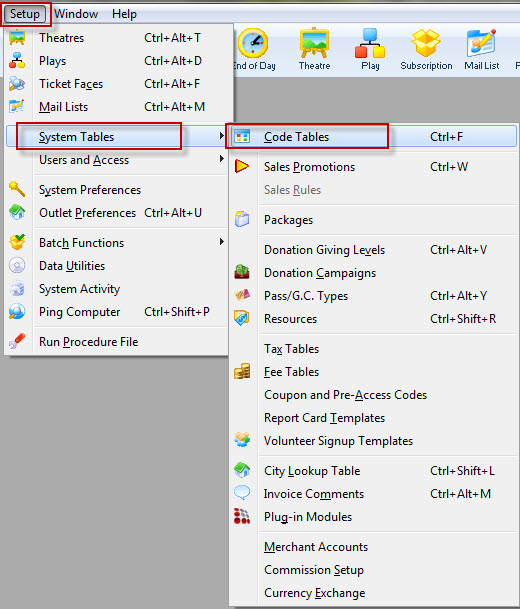
- Single click on the Custom Genre option in the left column.

This is not to be mistake with the default Play Genre for the TicketTrove application.
- Click the New
 button.
The Custom Genre (inserting) window opens.
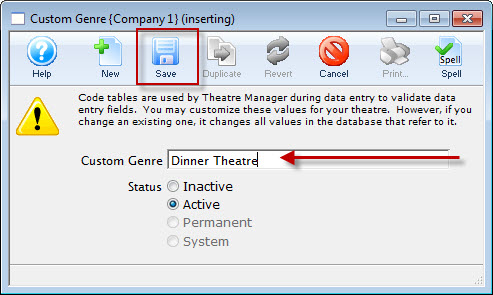
- Enter the name of the Genre to be added to the database.
Options may include items currently found in the Event Genre as well as those unique to the organization.
- Click the Save
 button and close the new Genre.
Repeat steps 3 through 5 above until all Genre's have been entered.
- Close the Code Tables window.
Step 3 - Setting a Custom Genre
Once the list of Genres is created, you need to assign them to each Performance. This method allows for flexibility between individual Performances.
- Click the Event
 button at the top of the window in Theatre Manager.
The event list opens.
- Search for and open the desired Event.
- Click the Performance tab.
- Open the Performance and select the desired Genre from the drop down.
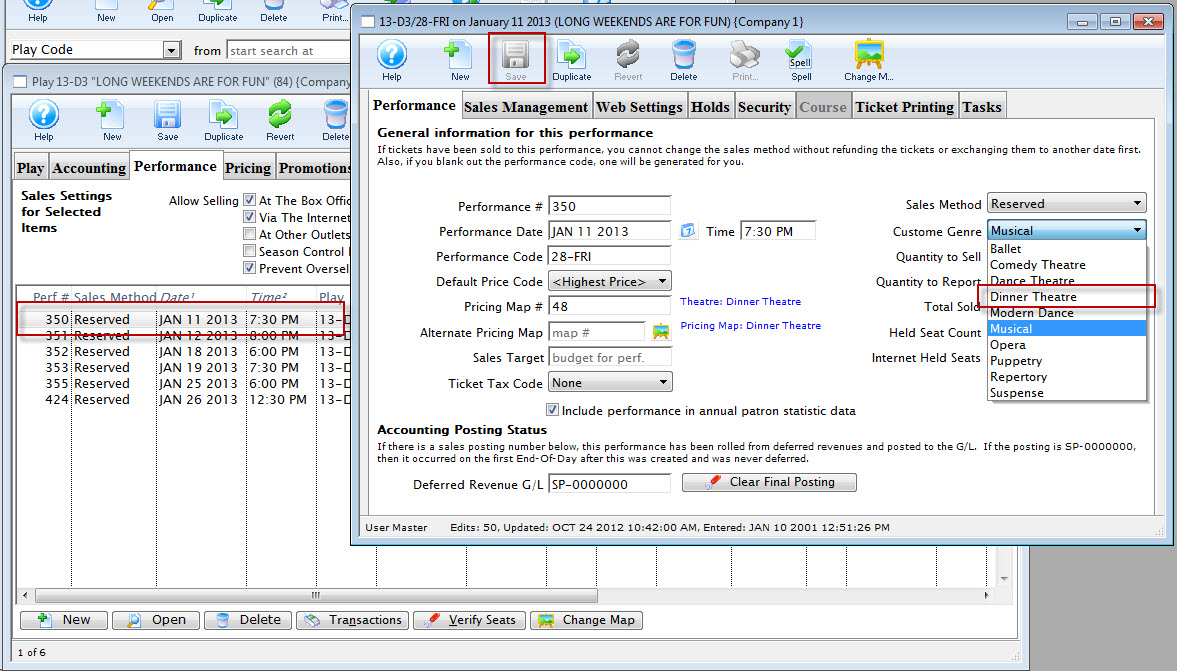
- Click the Save button and close the Performance detail window.
Repeat the steps until all Performances have a Genre.
- Close the Event window.
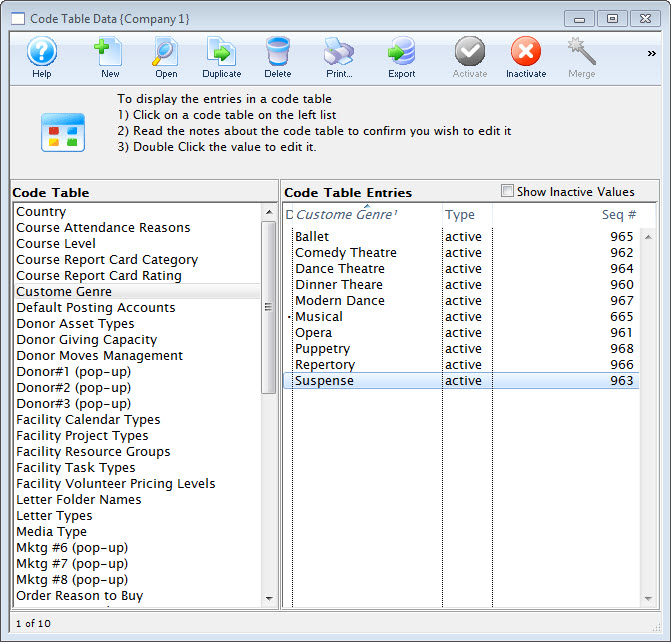
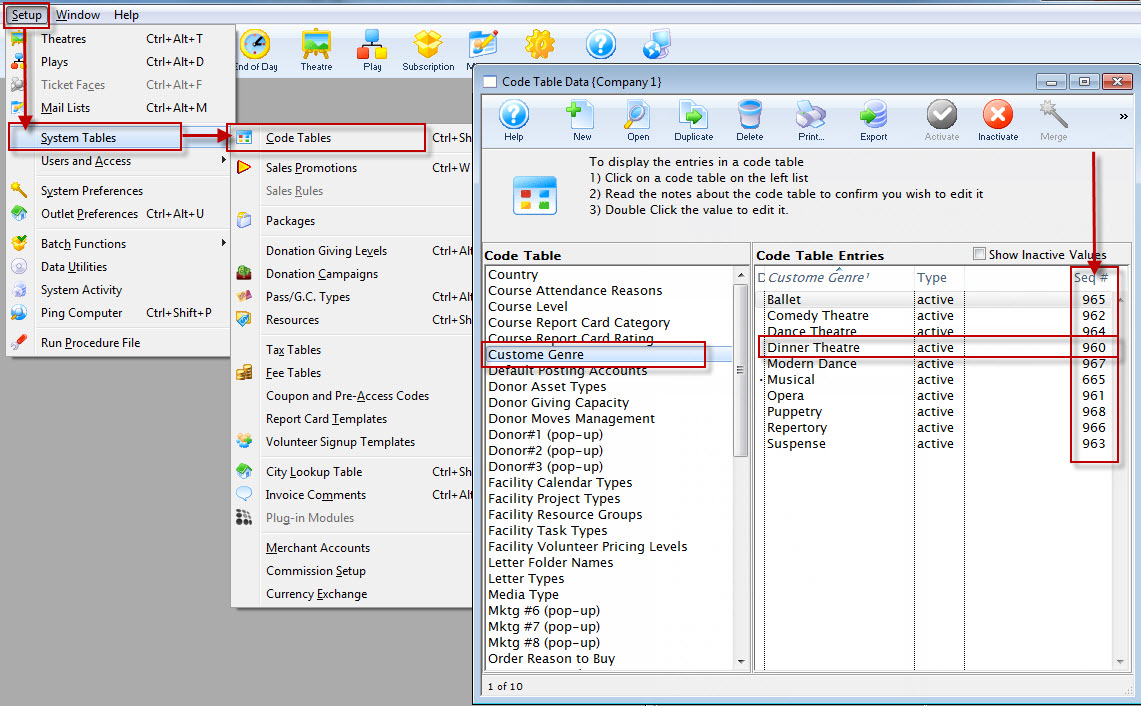
Step 4 - Locating the Custom Genre Sequence Number
Each Custom Genre is assigned a unique sequence number when you add it to the database. This sequence number is needed to add the Custom Genres to the online sales web page.
- Click Setup >> System Tables >> Code Tables.
- Choose the Custom Genre option in the left column.
This is not to be mistake with the default Play Genre for the TicketTrove application. The Sequence number will appear in the left column.
- Take note of the Sequence number and the corresponding Genre name.
5 - Adding Code to Web Page
The customized code can be added to the TMtickets.html page. Look for the Genre field on the template; lines 76 to 80.

Add the comment values to comment out the present Genre Drop Down as follows:

Then copy and paste the following code either above or below the Genre code you comment out and you will have your new custom Genre lookup based on the value of the Performance Field #. The code can be found below. The PB_TYPE1_FC_SEQ is followed by a number. This number is the Custom Genre Sequence number from above. Note that you can have as many lookups based value of the Sequence number you wish. Simply add as many [ option value="PB_TYPE1_FC_SEQ='XXX'">Comedy ] as you need.
<tr>
<td align="right">Custom Genre List</td>
<td>
<select name="search" id="search">
<option value="">"any kind"</option>
<option value="PB_TYPE1_FC_SEQ='955'">Comedy</option>
<option value="PB_TYPE1_FC_SEQ='956'">Drama</option>
<option value="PB_TYPE1_FC_SEQ='957'">Recital</option>
</select>
</td>
<td align="left">
<input name="btnGetEventList" type="submit" id="Search" value="Search" class="new" onMouseOver="pviiClassNew(this,'newover')" onMouseOut="pviiClassNew(this,'new')" onClick="process()"></td>
</tr>
The result will be the same as shown for the Event code of the previous page.
Once the code above has been added to the TMtickets.html page the page should be saved in the WebPagesEN folder. Clear the Cache on the web listener and refresh the page in the browser. The updated changes should now be visible and available to select.